Tuesday 2 June 2015

Tandoori Chicken Drumsticks


The world famous Indian Tandoori Chicken has its origin in the Mughal era during the rule of Emperor Jahangir, who is also credited for creating the portable or transportable tandoor.

Tandoor is a traditional clay oven holding a small fire created by slow burning coal or wood meant for baking and cooking.

Existence of the tandoor has been found at sites of the Indus Valley Civilization (Harappa and Mohenjo-daro) dating back to 3000 B.C.

Originally the tandoor cooking concept was from Persia which traveled to the Indian sub-continent with the Arabs via Afghanistan. 

The word Tandoor is derived from the Persian word "Tannur" which was derived from the Babylonian word "Tinuru" which further got polished to the word "Tandur" in Turkish.

The concept of built-in tandoor in a restaurant was first introduced at Moti Mahal restaurant in Delhi in the year 1948.

The restaurant owner Kundan Lal Gujral, wanted to create a unique dish using the traditional tandoor.

This lead to the creation of the famous "Tandoori Chicken".


The chicken pieces are marinated with yogurt, fresh lime or lemon juice, seasoned with Cayenne pepper, Kashmiri Red Chilli Powder, tandoori masala, turmeric powder, garlic paste, ginger paste and salt.

The chilly powder gives a red fiery hue and the turmeric powder gives an orange hue to the Tandoori Chicken. Some times yellow and red edible food colors are added to get bright colors.

Tandoori Chicken can also be cooked on a modern or traditional barbecue grill. I have cooked it on a gas stove using a skillet/tawa.

You can use an oven at 200 Degree/400 Fahrenheit for 10-12 minutes or until done.


The most simplest Indian non-vegetarian starters, it goes best when served with Mint/Pudina dip/chutney or with onion rings and lemon wedges.

Check out the ingredients and step by step method for preparing Tandoori Chicken Drumsticks.

Tandoori Chicken Drumsticks

Preparation/Total Time: 120 mins/180 mins
Servings: 3-4

Ingredients

10 Chicken Drumsticks
1 Lemon
1 tsp Garlic paste
1 tsp Ginger paste
6 Tbsp Hung Yogurt/Curd/Dahi
1 tsp Kashmiri Red Chilly powder
2 Tbsp Garam Masala or Tandoori Chicken Masala powder
Salt
1 Tbsp melted Butter for basting

Method

1. Wash, pat dry the chicken drumsticks with a clean cloth.

2. Make diagonal incisions on both sides of the drumsticks with a knife.

3. Now squeeze in the lemon juice and apply some salt to the drumsticks and keep aside for about 15 minutes.

4. Mix garlic paste, ginger paste, garam masala or tandoori masala, yogurt, Kashmiri red chilly powder, salt.

5. Marinade each drumsticks properly with the above mixture and keep aside for about 2 hours.

6. Now apply/baste each drumstick with the melted butter and keep aside.

7. Heat a non-stick Skillet/Tawa on medium flame.

8. Place each drumstick one by one on the skillet and cook on low flame for about 40 minutes or till the drumsticks are done.

Tip: Slow cooking method is ideal when making tandoori chicken on a gas stove.

9. Flip and cook each side of the drumsticks while basting them with the remaining marinade and melted butter.

10. Once done remove on a serving platter and serve with onions rings, lemon wedges or mint/pudina dip/chutney. You can sprinkle some chaat masala also.




Thursday 21 May 2015

Step by Step Recipe for Hyderabadi Bhuna Mutton Keema/Kheema/Qeema (Dry fried Minced Lamb Meat)


Hyderabadi cuisine is a blend of Mughlai, Arabic, Turkish cooking style along with local Marathwada and Telugu influence. Also known as Hyderabadi Ghizaayat (cuisine), this style of cooking was promoted by Sultan Quli of the Qutub Shahi Dynasty along with their own cuisine.

The cuisine evolved during the medieval period and was extended during modern period as a legacy of the Nizams of the then Hyderabad State that includes the regions of Marathwada, Telangana and Hyderabad Karnataka(currently in Karnataka).

Traditionally Hyderabadi style of cooking involves use of earthen pots, brass and copper utensils. The use of certain herbs, spices and condiments adds a distinct flavour to the Hyderabadi cuisine.

As the saying goes cooking patiently or "itmenaan se", so the key to the cuisine is the slow-cooking method.

Traditionally Bhuna Keema is prepared with minced lamb meat or keema which is fried with spices and condiments in oil or ghee/fat. 


This version of the recipe has been prepared using less oil and more of green chillies instead of the usual Red Chilly powder.

The recipe was shared by my former Hyderabadi cook during my stay in Mumbai. I have made use of fresh Green peas (Matar) in this recipe.

Being a dry spicy starter, Hyderabadi Mutton Bhuna Keema or Kheema or Qeema goes well with roti, naan, phulka or even steamed rice.

Hyderabadi Bhuna Mutton Keema

Preparation/Total Time:60-120 mins/150 mins
Serving: 4

Ingredients for Marinade:

500 gm Minced Mutton
1/2 cup Beaten Curd/Dahi
1 Tbsp Garlic Paste
1 tsp Turmeric/Haldi Powder
Salt to Taste

Method:

1. Clean the minced meat in running water and drain the water properly.
2. Add the garlic paste, turmeric powder, curd, salt to the meat. Mix well and keep aside for about 1 to 2 hours.

Ingredients for Frying:

1 1/2 Tbsp Vegetable Oil
2 large Onions, finely chopped
2 medium size Tomatoes,finely chopped
2-3 Green Chillies, chopped
1 tsp whole Shahjeera or Jeera/Cumin seed
1/2 tsp whole Green Cardamom/Chhoti Elaichi
1" grated Ginger
1/2 tsp whole Black Peppercorns/Kaali Mirch
1 Black Cardamom/Badi Elaichi
4-5 whole Cloves/Laung
1"Cinnamon/Dalchini
1/2 Tbsp Red Chilly Powder
1 Tbsp Coriander powder, heaped
1/2 tsp Garam Masala Powder
1/2 cup fresh Green Peas
3 Tbsp (45 ml) Water
Fresh Cream 2 Tbsp
Finely Chopped Coriander leaves for Garnishing

Method:

1. Heat oil in a non-stick pan or kadahi. Add in the whole spices (cumin, green cardamom, cloves, black cardamom, cinnamon, black peppercorns). Let the spices splutter for a min.

2. Add in the chopped onions and stir fry on a medium flame till golden brown.

3. Add in chopped green chillies, coriander powder, red chilly powder, grated ginger, garam masala powder. Saute for 1 to 2 mins and add in the tomatoes. Saute till the tomatoes turn tender.

4.Now add in the green peas. Saute for 3 to 4 mins.

5. Add in the marinated minced meat. Cook on a medium flame for about 20 mins or till the meat is cooked properly. Add water 1 Tbsp at a time when cooking the meat.

6. Before turning off the stove add in fresh cream.

7. Remove in a serving bowl and garnish with finely chopped coriander leaves.

8. Serve hot with roti, naan or phulka.


Thursday 14 May 2015

Step by Step Preparation of Balti or Kadahi Chicken Drumsticks


After the spicy South Indian-styled Red Snapper fish curry, I thought of preparing a Chicken curry since my hubby isn't much of a fish-lover unlike me. So last evening keeping that in my mind I took out few Chicken drumsticks which were there in the refrigerator's freezer and cooked a Peshawari Balti or Kadahi Chicken Drumsticks slightly different from the Peshawari Balti/Kadahi Gosht/Mutton preparation.

Since the mercury level is already soaring high these days, I opted for the original Balti or Kadahi cooking this time wherein the drumsticks are fried and cooked along with the spices and vegetables without marination. Also, I have added in the bell peppers to make it a colorful dish.

Following is the step by step preparation of the Balti or Kadahi Chicken Drumsticks.

Ingredients

6 pieces or 540 g Chicken Drumsticks
3 Tbsp Vegetable Oil
2 Bay/Tejpatta leaves
1 tsp whole Shahjeera or Cumin/Jeera
4 Green Cardamom/Chhoti Elaichi
2 Black Cardamom/Badi Elaichi
1 inch Cinnamon stick/Dalchini
5-6 Black Peppercorns
1 Mace/Jaipatri
4-5 whole Clove/Laung
3 medium size Onions finely chopped
1 tsp Turmeric Powder
2 tsp Kashmiri Chilly Powder
2 tsp Garam Masala Powder
1 heaped Tbsp Coriander/Dhania Powder
1 tsp Cumin/Jeera Powder
2 tsp Garlic Paste
2 tsp Ginger Paste
3 Tbsp hung and beaten Curd/Dahi
Salt to taste
2 medium size Tomatoes cut into cubes
1/2 Yellow Bell Pepper cut into cubes
1 small Capsicum/Green Bell Pepper cut into cubes
6-7 slit Green Chillies for the gravy
1 tsp Sugar
Fresh Coriander leaves, finely chopped for garnishing
3 slit Green Chillies for garnishing

Method

1. Heat oil in a heavy-bottomed kadahi or wok and add in the whole spices (bay leaves, shahjeera or jeera, green cardamoms, black cardamoms, black peppercorns, mace, cloves and cinnamon sticks). Let them splutter for a minute.

2. Add the sliced onions and saute on a medium flame till the onions turn translucent.

3. Add garlic paste, ginger paste, turmeric powder, Kashmiri chilly powder, coriander powder, cumin powder, garam masala powder, salt and saute for few minutes.

4. Add in the chicken drumsticks one by one and stir fry on a low flame for about 5 mins.

5. Add in the beaten curd and mix slowly. Cover and cook on a low flame till the chicken is tender.

6. Now time to add in the tomatoes, bell peppers, slit green chillies and sugar. Mix slowly and cook on low flame uncovered for 5 mins or till the vegetables are cooked. (Avoid over-cooking to retain the color of the vegetables)

7. Time for some garnishing before serving. So remove the cooked Balti or Kadahi Chicken drumsticks one by one in a serving bowl and garnish with the chopped coriander leaves and green chillies, Serve hot with roti, naan or steamed rice.

Step by Step Recipe for Spicy South Indian-styled Red Snapper/Sankara Meen Curry


When it comes to sea-food cooking the Indian way, no other cooking can beat the Coastal States way of cooking sea-food. Recently I took a short break to Daman (divided into Moti Daman and Nani Daman) with my family (we opted for Moti Daman near Devka beach), a Union Territory of India, close to the state of Gujarat where I am currently located at. Whenever I visit a new place I always make it a point to try out some local delicacies of that place. However the trip wasn't as good as I expected with regards to sea-food for me, since Daman is a coastal place I have had the impression of getting the opportunity to try some nice sea-food preparation the local way. But I did not get much to try and taste.

So my hubby surprised me this Tuesday by getting some sea-food for me from the local fish-monger before leaving for work.

Out of the varieties of sea-food, I selected the Red Snapper fish for a first time recipe which was shared to me by my Dad years ago.

Let us check out the step by step recipe for a spicy South Indian styled Red Snapper fish or Sankara Meen Curry which is excellent during the hot Summer days too.

Preparation/Total Time: 15 mins/50 mins
Serving: 4-5

Ingredients for the Marinade

700 g Red Snapper fish/Sankara Meen cut into 3/4 size pieces
2 generous pinch of Turmeric/Haldi Powder
1/4 tsp Salt

Method

Marinade the fish pieces with the Turmeric powder and salt. Keep aside.

Ingredients for the Gravy

2 large Onions chopped
2 large Tomatoes cut into pieces
8 Garlic Cloves
3 Tbsp Vegetable Oil
1 tsp whole Mustard/Rai
2 tsp whole Cumin/Jeera
6-8 Curry Leaves
2 medium-size Onions finely chopped
1 1/2 tsp Fenugreek/Methi seeds
1 1/2 tsp Black Sesame seed
2 tsp Red Chilly Powder
1 1/2 tsp Coriander Powder
1 tsp Turmeric Powder
1 1/2 tsp Cumin/Jeera Powder
Salt to taste
6-8 Green Chillies slit into halves
6-8 Garlic cloves halved
A Lemon size tamarind pulp ball soaked in water
1/4 cup or a handful of chopped Coriander leaves

Method

1. Ground the onion, tomato and garlic into a smooth paste and keep aside.

2. Heat the oil in a pan and temper the mustard seeds, cumin seeds, fenugreek seeds, black sesame seeds and curry leaves.

3. Add in the finely chopped onions, halved garlic, slit green chillies, once the above spices starts spluttering. Saute for 2-3 mins on a medium flame.

4. Add in the turmeric powder, salt, red chilly powder and saute on a medium flame until the raw and pungent smell of the onions and garlic is gone.

5. Now strain and extract tamarind paste out of the soaked tamarind pulp. Add this paste into the pan. Cook for another 5 mins.

6. Add water as per your gravy requirement (I have added in approx. a cup of water), cover and boil on high flame for 15 to 20 mins.

7. After that add in the marinated fish pieces one by one into the gravy and simmer on low flame for another 15 mins or little more.

8. Once done, turn off the stove and remove the fish curry in a serving bowl.

9. Garnish with chopped coriander leaves and serve hot with steamed rice.


Step by Step Recipe for Peshawari Balti or Kadahi Gosht/Mutton


Posting my recipes after a long gap. So thought of starting with this not so recent Mutton preparation. Whenever I try a recipe I always love to research a bit about the origin of the recipe. So henceforth my recipes will come with a little bit of information regarding the place of origin and the story behind its origin. Hope that will help those of you who are curious to learn a bit about the recipe story like me. 

As the name goes the origin of this recipe goes to a place called Landi Kotal, a rustic and traditional city of Khyber Pakhtunkhwa in Pakistan. The recipe traveled to Punjab and the rest of the world slowly. The cooking is done in a heavy-bottomed Wok-like pot or locally called Balti as such the name goes by Balti Gosht. 

The meat is cooked with all the spices and vegetables without any marination, instead I tried cooking it by marinating with some of the condiments and then cooking with the rest of them and vegetables. A slightly sweet gravy preparation on the spicier side, it goes excellent when served with naan, roti or even steamed rice.

Without further delay, let us check out the step by step recipe for Peshawari Balti or Kadahi Gosht.

Ingredients for the Marinade

500 g Mutton
2 tsp Ginger paste
2 tsp Garlic paste
1/2 tsp Red Chilly Powder
3 Tbsp hung and beaten Curd/Yogurt/Dahi
1/2 tsp Turmeric/Haldi Powder
1 tsp Cumin/Jeera Powder
1 Tbsp Mustard Oil

Method

Apply the ingredients and marinade the mutton pieces for about 5 to 6 hours.

Ingredients for the Gravy

3 Tbsp Vegetable Oil
2 Bay leaves/Tejpatta
1 tsp whole Shahjeera/Cumin/Jeera
4 Green Cardamom/Chhoti Elaichi
2 Black Cardamom/Badi Elaichi
1 inc Cinnamon stick/Dalchini
5 Black Peppercorns/Kali Mirch
1 Mace/Jaipatri/Javitri
4-5 whole Cloves/Lavang/Laung
2 medium-sized finely sliced Onions
2 tsp Kashmiri Chilly Powder
1 tsp Red Chilly Powder
2 tsp Garam Masala Powder
1/2 tsp Turmeric Powder
1 Tbsp Coriander/Dhania Powder heaped
Salt to Taste
4 medium-sized Tomato blanched and pureed (I did not blanch the tomatoes as I wanted a tangy gravy)
2 tsp Sugar
1/3 cup chopped Fresh Coriander leaves for garnishing
3-4 slit Green Chillies for garnishing
1 Tbsp of Fresh Cream for garnishing(optional)

Method

1. In a heavy-bottomed wok or kadahi heat the oil and let splutter the whole spices (Bay leaves, Cumin seeds, Green Cardamom, Black Cardamom, Cinnamon, Black Peppercorns, Clove) for 1 minute.

2. Now add in the sliced onions and fry them on a medium flame till golden brown. Keep sauteing to avoid over-frying the onions.

3. Now add in the powder spices (Kashmiri Chilly Powder, Red Chilly Powder, Garam Masala Powder, Turmeric Powder, Coriander Powder).

4. After adding in the spices add in the marinated mutton pieces one by one, saute and cook on a low flame till the meat gets tender. 

5. Add in the tomato puree, sugar and cook until the oil starts to separate. You can add water in small portions to avoid burning the gravy. Stir regularly.

6. Once cooked and the oil floats on the top of the gravy, remove it from the stove. Garnish with fresh cream, chopped coriander leaves and green chillies. Serve hot with roti, naan or steamed rice.

Tip: If you want you can substitute Red Chilly Powder with fresh Green Chillies.
Instead of Tomato Puree you can cut the tomatoes into large cubes and add in the preparation.


Friday 10 April 2015

Step by step Recipe for Egg-less Chocolate Bar Pressure Cooker Cake


Prepared my second Pressure Cooker Chocolate cake (this time it was an Egg-less one) after 8 years recently but with a Chocolate bar since cocoa powder was out of stock. It is fun to bring out your creativity in cooking especially when you try and experiment a recipe with your own choice of ingredients which should definitely do justice to your invention.

So the step by step recipe of my Egg-less Chocolate Bar Pressure Cooker Cake is as follows.

Preparation/Total time: 1 Hour 15 mins
Serving: 3-4

Ingredients:

11/2 cup All purpose Flour or Maida
11/2 tsp Baking Powder
165 g regular melted Chocolate Bar or alternately you can use 1/2 cup Cocoa Powder
1/2 cup melted unsalted Butter or Oil
1 cup Yogurt or Dahi (or alternately take 1 cup of milk and add 1 tbsp of white vinegar into it let it stand for few minutes and it will be ready for further use)
1 tsp Pure Vanilla Extract or Good quality Vanilla Essence
A pinch of Salt (skip salt if using salted butter)

Method

1. Pre-heat the pressure cooker on high flame for 3-4 mins with the lid on and the pressure regulator removed (if you are using an oven then pre-heat to 180 degree C). Now line the bottom of an 7" cake tin, grease and dust the tin.

2. Whisk and sieve the flour, baking powder, and salt twice and keep the dry mixture in a bowl. (you can include cocoa powder in this process if you want to skip using the chocolate bar)

3. Whisk in the butter or oil, vanilla extract and in another bowl. (whisk in the melted chocolate too in this step if you are using it or else add in 3/4 cup of powdered Sugar or more as per your taste)

4. Add and whisk in or blend the yogurt or dahi into the wet ingredient mixture properly.

5. Now gradually add  in the dry ingredients to the wet ingredients and blend or mix well with a blender or a fork until the batter is free from any lump. (the batter should not be too thick, you can add in 1 tbsp of milk if it is very thick)

Note:In my Egg-less Vanilla Pressure Cooker Cake recipe I have added and mixed the wet ingredients into the dry ones. This time I have added and mixed the dry into the wet ingredients.

6. Pour the batter into the greased cake tin and place it directly inside the pressure cooker.

7. Bake for 30 to 35 minutes on a low flame with the lids on without the pressure regulator or insert a toothpick in the centre of the cake to check if it comes out clean, if not then keep it for some more time until done.

8. Now open the lid and remove the cake tin from the pressure cooker (oven) and let it cool for 5 mins.

9. Remove the cake upside down on a plate or wire rack and let it cool completely.

10. Slice and serve your Egg-less Chocolate Bar Cake.

Ideal to be served with evening tea. Hope this easy recipe will help you bake a simple egg-less chocolate bar cake in a pressure cooker in case you want to bake it in your cooker. Do try out this recipe and share with friends too. Thanks for going through the recipe. Until then happy baking.

Saturday 28 March 2015

Step by Step Simple Tawa Fish Fry Recipe


A simple fish fry recipe for fish lovers. It can be had as an appetizer or a side course too. Check out the ingredients and step by step preparation. I have used King/Seer Fish for this version of tawa fish fry.

Preparation/Total Time: 25 mins
Servings: 4

Ingredients

4 large or medium-sized pieces of Fish (of your choice)
1/2 a piece of fresh Lemon juice
3 tbsp of Semolina or Sooji/Rava
1 tsp Turmeric Powder
1 tsp Coriander Powder
1/2 tsp Red Chilli Powder
1/2 tsp Garam Masala Powder
Salt to taste
1 tbsp Olive Oil for Indian Cooking

Method

  1. Clean and wash the fish pieces, pat dry and keep them aside on a plate.
  2. Now marinate the fish pieces with lemon juice and salt and keep them aside for 10 mins.
  3. In a plate, mix all the dry ingredients together (semolina or sooji/rava, turmeric powder, coriander powder, red chilli powder, garam masala powder, salt).
  4. Heat a non-stick fry pan on the stove and pour the olive oil into it.
  5. One by one take the fish pieces and apply a coat of the dry ingredients mixture properly on both sides.
  6. Now put the fish pieces one by one into the frying pan and shallow fry them on a medium flame.
  7. Turn the pieces on both sides till they are golden brown.
  8. Remove and serve the tawa fish fry as an appetizer or a side course.
Come back and keep checking my blog for more recipes.Till then try and enjoy this recipe with your loved ones and share this easy recipe with friends.

Note: I use Olive oil meant for Indian cooking in all my cooking.


Friday 27 March 2015

Step by Step Egg-less Vanilla Cake in a Pressure Cooker


My family isn't much fond of the fasting delicacies which I like to savour. So I treated them with this Egg-less Vanilla Cake, prepared in a pressure cooker (most convenient for me to make and bake cakes as well as steam my idlis too).
Lets not delay and instead check out the preparation of my version of Egg-less Vanilla Cake step by step in a pressure cooker.

Preparation/Total Time: 1 hour 10 mins (cooking time was only 30 mins)

Serving: 4

Ingredients:

2 cups of all purpose Flour or Maida
2 1/2 tsp of Baking Powder
1/2 cup and 2 tbsp of Condensed Milk
1 tbsp White Vinegar (I have used non-fruit Vinegar)
1/2 cup Salted or Unsalted Butter, melted (I have had used the salted one)
A pinch of Salt (skip it if you are using salted butter)
1/2 cup water
1 tsp Vanilla Essence or Extract (use a good quality Vanilla Essence for better flavour)
9 inch or an 8 inch Cake tin (any shape)

Method

  1. Sieve the flour and baking powder and keep them aside in a glass mixing bowl.
  2. In a separate bowl mix the melted butter, condensed milk and whisk or blend well.
  3. Now add the vanilla essence or extract, water and vinegar into the butter and condensed milk mixture and whisk or blend well.
  4. Then add the wet ingredients to the dry ingredients.
  5. Whisk or blend the mixture properly and see that no lump is present.
  6. The mixture will come out smooth after proper whisking or blending.
  7. Grease a 9 inch or an 8 inch cake tin with butter and dust it with some all purpose flour. Remove the extra flour.
  8. Now pour the batter into the cake tin.
  9. Pre-heat the pressure cooker on high flame for about 3 to 4 mins with the lids on and without the pressure regulator.
  10. Now place the cake tin into it carefully without burning your hands while placing it inside the cooker.
  11. Cover without the pressure regulator, lower the flame and let it cook for another 30 mins.
  12. Check the cake by inserting a toothpick after 20-25 mins, if it comes clean your cake is ready. (which will definitely come clean)


13. Let it cool for some time.
14.Remove it (upside down) on a plate or a wire rack and let it cool completely.


15. Slice and serve your egg-less vanilla cake.

Do try and share the recipe with everyone. And comeback for more recipes. Until then enjoy your egg-less vanilla cake with your loved ones.


    Saturday 21 March 2015

    Step by Step Recipe for Paneer Lababdaar


    This is a very simple dish which I have been cooking since past 9 years. Ideal as a Main Course Vegetarian dish.
    Check out the step by step preparation for Paneer Lababdaar.

    Preparation/Total Time: 40 mins approx.
    Serving: 4

    Ingredients
    200 gm Paneer (Farmer/Curd Cheese) cut into small cubes
    3 medium size Onions thinly sliced
    1 medium size Onion thinly sliced
    1" of julienne (thin long slices) Ginger
    1 medium size Tomato, pureed
    200 ml Fresh Cream
    1 tbsp Butter
    1/2 tsp Red Chilli Powder
    1 tsp Sugar (optional)
    1 tsp Garam Masala Powder
    Salt to taste
    3 tbsp Olive Oil (meant for cooking Indian dishes,I have used Borges Olive oil meant for Indian Cooking)

    Method


    1. Heat 1 tbsp olive oil in a non-stick pan and add 1 medium size thinly sliced onion in it, stir fry till caramelized on a medium flame.


    2. Remove and keep it aside.
    3. Now heat the remaining 2 tbsp olive oil and add in the other 3 thinly sliced onions and stir fry till golden brown.


    4. Put in the julienne ginger and stir fry for 2 mins.


    5. Add in the red chilli powder, sugar and salt and stir fry for a minute.
    6. Add in the tomato puree and saute for 3 mins.


    7. Now add in the paneer cubes and saute for 2 to 3 mins.


    8. Add in the fresh cream and  garam masala powder and saute for another 2 mins and let it simmer on a low flame for 2 to 3 mins.


    9. Add in the butter and saute properly. Turn off the stove after 1 min.


    10.Garnish with the caramelized onions and serve your Paneer Labadaar with plain paratha or phulka or with rice.

    Wednesday 18 March 2015

    Step by Step Recipes (Preparation) for Amla (Indian Goose berry) Sharbat (lemonade) and Mukhwas (Mouth Freshner)


    This is a step by step Amla (Indian Gooseberry) sharbat (lemonade) syrup and mukhwa (mouth freshner) recipe which I have learnt from a very dear Aunt of mine 5 years ago.

    The step by step recipes for this healthy refreshment and mouth freshner are as follows:

    Preparation Time: 30 mins

    Cooking Time: None

    Ingredients

    1/2 kg of Amla or Indian Gooseberry (large-sized)
    2 kg of Sugar Powder (sugar ground to a powdered form at home)

    Method to Prepare the Amla Syrup

    1. First wash the amlas and wipe them dry.


    2. Then cut the amlas and deseed them. Keep them aside in a large bowl.


    3.  Grind or grate the amlas in two batch and keep aside. I prefer grating the amlas.


    4.  Add the sugar powder into the ground or grated amlas and mix well with a spoon.

    5. Keep this mixture aside, covered with a lid for a week, keep mixing with a spoon in every 2-3 days regularly as the sugar starts melting slowly.

    6. After a week the sugar melts completely and the mixture becomes concentrated (as shown below). Now strain this mixture and separate the concentrated amla syrup from the leftover amla pulp.


    7. Store the amla syrup in a glass bottle and refrigerate. (This can be stored for a longer duration. When refrigerated the color of the syrup might change).


    8. Now sun dry the amla pulp by spreading on a clean cloth. After few days of drying out in the sun the leftover amla pulp will dry and turn crispy.


    9. Store and keep the dried amla flakes in an air tight glass container and have it as a mouth freshner.

    Serve your guests and loved ones with this healthy sharbat or lemonade syrup by mixing 2 to 3 tsp of the concentrated syrup with a glass water and adding 1/2 a tsp of fresh ginger juice. You don't need to add extra sugar to your sharbat.

    Surprise your friends with your own step by step preparation for amla (Indian gooseberry) sharbat (lemonade) and mukhwas (mouth freshner) and compel them to ask you for the recipes.

    Monday 16 March 2015

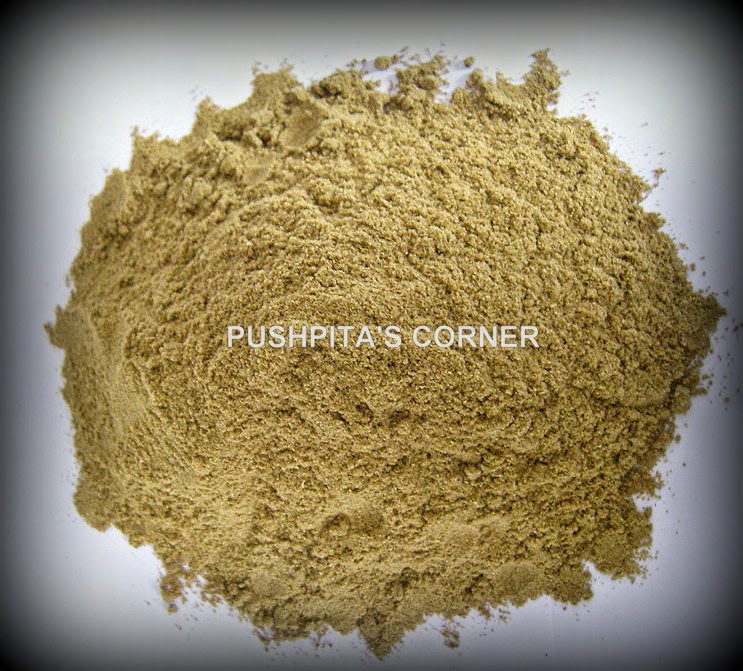
    Recipe for Chaat Masala Powder


    Preparation/Total Time: 5 minutes
    Ingredients:
    3 tbsp of Cumin seeds (Jeera)
    1 tbsp of Coriander seeds (Dhania)
    1 ½ tsp of Fennel seeds (Saunf)
    4 tbsp of raw Mango Powder (Amchoor Powder in India)
    3 tbsp of Black Salt Powder
    1 ½ tsp of fresh Ground Pepper Powder
    1/4th tsp of Asafoetida Powder
    1 ½ tsp of dry Ginger Powder
    1 tsp of Mint Powder (dried Pudina leaves ground to a powder form)
    1 ½ tsp of Carom seeds (Ajwain in India)

    Method
    On a hot flat griddle set on medium flame dry roast all the above mentioned ingredients till they give out their aroma, while stirring continuously to avoid burning the whole spices. Let them cool on a plate.  Then put the roasted spices into a food blender and ground them to a smooth and fine powder form.

    Note: This is an easy method, making it few times will definitely make an expert out of you soon then. Do not store this powder for more than 2 to 3 months as they tend to lose the aroma and flavor. Store in an airtight glass container, in a cool and dry place (best in your fridge). Why not get loads of appreciation out of your efforts for a custom made blend from loved ones and friends.

    Tips:
    You can add your chaat masala to any salad preparation (right from mixed fruit salad to your favorite green vegetable salad too)
    Fond of fresh lemon juice? Add a zing to your fresh lemon juice or lemonade with a pinch of your homemade chaat masala and enjoy a different taste of your regular lemonade and juice.


    Recipes for Homemade Idli Batter and Idli With Coconut Chutney (Dip)


    Idli with coconut chutney and sambhar is something everyone enjoys. My family too look forward to having idlis for breakfast very often, especially my 8 year old son, who enjoy it with tomato sauce (his most favored lunchbox item throughout the week at school). So I always make the batter at home as, I don't prefer the ready-made bater which is tangier than the homemade one (sharing the ingredients and process to prepare the batter too below along with the idli and coconut chutney recipes).
    So lets get started with the batter recipe first since without it we cannot proceed with the main recipe for idli and chutney (dip).

    Idli Batter and Idli Recipes

    Soaking Time: 4-5 hours
    Preparation time: 20-25 mins
    Fermentation Time: 8-9 hours during Summer and almost for 18 hours during Winter (keep in a warm place)
    Cooking Time: 25 mins.
    Serving : 30-32 idlis

    Ingredients for the Batter:
    3 small cups of Split Urad dal or Black Gram skinned (Urad Dhuli in Hindi)
    1 1/2 small cups of Par Boiled rice (you can make use of any other rice too including brown rice)
    Salt to Taste

    Preparation
    1. Wash and soak the dal and the rice in two separate large bowls. Keep them aside for atleast 4 to 5 hours.
    2. Now drain the water from both the rice and dal and keep the dal soaked water aside for later use.
    3. Wet the inner surface of the grinder and put rice into it to grind in 2-3 small batches to a paste (not thick nor thin) (add 1-2 tbsp of the reserved urad dal water in between) not finely ground leave it slightly coarse as it will make your idli softer when you prepare it. (earlier I use to finely grind the rice into a smooth paste but 2 weeks ago I tried experimenting by leaving the rice paste slightly coarse, the idlis were softer than previously prepared ones).
    4. Now turn to make the urad dal paste or batter. Wet the inner surface of the grinder and put the urad dal into it for grinding in 2 batches to a smooth paste (not thick nor thin) (add 2 or 3 tbsp of the reserved dal water in between the grinding process).
    5. Now mix both ground paste properly and cover with a lid (No air-tight lids). Keep the paste aside overnight for fermentation (preferably for 9 hours). (the wild yeast in the urad dal as well as some anaerobic bacteria helps in the fermentation process along with the ideal temperature for the process which is between 30 degrees to 32 degrees. So the warmer the temperature the better for the fermentation process and your batter too).
    6.  Next morning to your surprise you will find the batter double the original level or might even  reach the lid as it happens with me every time I prepare this bater.
    7. Now in a pressure cooker pour some water and let the water boil.
    8. In the mean time, grease the idli mould with oil. I use butter for my son, almost like butter idli for him).
    9. Now take the batter and add some salt to taste to the batter and swirl the bater gently for few minutes.
    10. Take a spoon and pour the batter into the the moulds.
    11. Put the idli mould inside the cooker for 10 to 12 mins and steam removing the vent of the cooker lid.
    12. In between check with a toothpick to see if the idli is done. If the toothpick doesn't come clean then keep it for few more mins. until it is done.( do not overcook else the idlis will become dry)
    Turn to prepare our Chutney or Dip

    Ingredients for the Coconut Chutney:
    1 cup or 250 ml of fresh grated coconut
    1 green chilly (optional)
    1 or 2 Garlic Flakes
    1/2" fresh Ginger
    1 tbsp roasted Chana Dal (Split skinned Bengal gram)
    1-2 tbsp Water
    Salt to Taste

    For Tempering:
    1/2 tsp Black Mustard/Rai Seeds
    3/4th tsp Urad Dal
    1 sprig of Curry leaves
    A pinch of Hing or Asafoetida
    1 tbsp of Vegetable oil

    Preparation:
    1. Grind all the main ingredients for the Chutney (not the one meant for tempering) to a smooth paste. (Add water in between for a smooth paste).
    2. Now heat oil in a pan and add the mustard seeds and urad dal.
    3. Let the mustard seed splatter and the urad dal turn light brown in color.
    4. Add the curry leaves and hing to it and fry for few seconds. (My curry leaves went out of stock today so didn't add any)
    5. Pour the coriander-coconut paste and stir.
    6. Serve this chutney with the idli. (See the post image, we have had it today morn for breakfast).
    I am sure after going through this post your self-made idli batter and the healthy, tasty and filling breakfast out of it accompanied by the chutney or dip will leave the tummies happy and satisfied till lunch time.
    Do get back and share your idli making and eating experience you have had with your loved ones. Share this easy recipe with your friends too. Until then happy serving and eating too!