Saturday, 28 March 2015

Step by Step Simple Tawa Fish Fry Recipe


A simple fish fry recipe for fish lovers. It can be had as an appetizer or a side course too. Check out the ingredients and step by step preparation. I have used King/Seer Fish for this version of tawa fish fry.

Preparation/Total Time: 25 mins
Servings: 4

Ingredients

4 large or medium-sized pieces of Fish (of your choice)
1/2 a piece of fresh Lemon juice
3 tbsp of Semolina or Sooji/Rava
1 tsp Turmeric Powder
1 tsp Coriander Powder
1/2 tsp Red Chilli Powder
1/2 tsp Garam Masala Powder
Salt to taste
1 tbsp Olive Oil for Indian Cooking

Method

  1. Clean and wash the fish pieces, pat dry and keep them aside on a plate.
  2. Now marinate the fish pieces with lemon juice and salt and keep them aside for 10 mins.
  3. In a plate, mix all the dry ingredients together (semolina or sooji/rava, turmeric powder, coriander powder, red chilli powder, garam masala powder, salt).
  4. Heat a non-stick fry pan on the stove and pour the olive oil into it.
  5. One by one take the fish pieces and apply a coat of the dry ingredients mixture properly on both sides.
  6. Now put the fish pieces one by one into the frying pan and shallow fry them on a medium flame.
  7. Turn the pieces on both sides till they are golden brown.
  8. Remove and serve the tawa fish fry as an appetizer or a side course.
Come back and keep checking my blog for more recipes.Till then try and enjoy this recipe with your loved ones and share this easy recipe with friends.

Note: I use Olive oil meant for Indian cooking in all my cooking.


Friday, 27 March 2015

Step by Step Egg-less Vanilla Cake in a Pressure Cooker


My family isn't much fond of the fasting delicacies which I like to savour. So I treated them with this Egg-less Vanilla Cake, prepared in a pressure cooker (most convenient for me to make and bake cakes as well as steam my idlis too).
Lets not delay and instead check out the preparation of my version of Egg-less Vanilla Cake step by step in a pressure cooker.

Preparation/Total Time: 1 hour 10 mins (cooking time was only 30 mins)

Serving: 4

Ingredients:

2 cups of all purpose Flour or Maida
2 1/2 tsp of Baking Powder
1/2 cup and 2 tbsp of Condensed Milk
1 tbsp White Vinegar (I have used non-fruit Vinegar)
1/2 cup Salted or Unsalted Butter, melted (I have had used the salted one)
A pinch of Salt (skip it if you are using salted butter)
1/2 cup water
1 tsp Vanilla Essence or Extract (use a good quality Vanilla Essence for better flavour)
9 inch or an 8 inch Cake tin (any shape)

Method

  1. Sieve the flour and baking powder and keep them aside in a glass mixing bowl.
  2. In a separate bowl mix the melted butter, condensed milk and whisk or blend well.
  3. Now add the vanilla essence or extract, water and vinegar into the butter and condensed milk mixture and whisk or blend well.
  4. Then add the wet ingredients to the dry ingredients.
  5. Whisk or blend the mixture properly and see that no lump is present.
  6. The mixture will come out smooth after proper whisking or blending.
  7. Grease a 9 inch or an 8 inch cake tin with butter and dust it with some all purpose flour. Remove the extra flour.
  8. Now pour the batter into the cake tin.
  9. Pre-heat the pressure cooker on high flame for about 3 to 4 mins with the lids on and without the pressure regulator.
  10. Now place the cake tin into it carefully without burning your hands while placing it inside the cooker.
  11. Cover without the pressure regulator, lower the flame and let it cook for another 30 mins.
  12. Check the cake by inserting a toothpick after 20-25 mins, if it comes clean your cake is ready. (which will definitely come clean)


13. Let it cool for some time.
14.Remove it (upside down) on a plate or a wire rack and let it cool completely.


15. Slice and serve your egg-less vanilla cake.

Do try and share the recipe with everyone. And comeback for more recipes. Until then enjoy your egg-less vanilla cake with your loved ones.


    Saturday, 21 March 2015

    Step by Step Recipe for Paneer Lababdaar


    This is a very simple dish which I have been cooking since past 9 years. Ideal as a Main Course Vegetarian dish.
    Check out the step by step preparation for Paneer Lababdaar.

    Preparation/Total Time: 40 mins approx.
    Serving: 4

    Ingredients
    200 gm Paneer (Farmer/Curd Cheese) cut into small cubes
    3 medium size Onions thinly sliced
    1 medium size Onion thinly sliced
    1" of julienne (thin long slices) Ginger
    1 medium size Tomato, pureed
    200 ml Fresh Cream
    1 tbsp Butter
    1/2 tsp Red Chilli Powder
    1 tsp Sugar (optional)
    1 tsp Garam Masala Powder
    Salt to taste
    3 tbsp Olive Oil (meant for cooking Indian dishes,I have used Borges Olive oil meant for Indian Cooking)

    Method


    1. Heat 1 tbsp olive oil in a non-stick pan and add 1 medium size thinly sliced onion in it, stir fry till caramelized on a medium flame.


    2. Remove and keep it aside.
    3. Now heat the remaining 2 tbsp olive oil and add in the other 3 thinly sliced onions and stir fry till golden brown.


    4. Put in the julienne ginger and stir fry for 2 mins.


    5. Add in the red chilli powder, sugar and salt and stir fry for a minute.
    6. Add in the tomato puree and saute for 3 mins.


    7. Now add in the paneer cubes and saute for 2 to 3 mins.


    8. Add in the fresh cream and  garam masala powder and saute for another 2 mins and let it simmer on a low flame for 2 to 3 mins.


    9. Add in the butter and saute properly. Turn off the stove after 1 min.


    10.Garnish with the caramelized onions and serve your Paneer Labadaar with plain paratha or phulka or with rice.

    Wednesday, 18 March 2015

    Step by Step Recipes (Preparation) for Amla (Indian Goose berry) Sharbat (lemonade) and Mukhwas (Mouth Freshner)


    This is a step by step Amla (Indian Gooseberry) sharbat (lemonade) syrup and mukhwa (mouth freshner) recipe which I have learnt from a very dear Aunt of mine 5 years ago.

    The step by step recipes for this healthy refreshment and mouth freshner are as follows:

    Preparation Time: 30 mins

    Cooking Time: None

    Ingredients

    1/2 kg of Amla or Indian Gooseberry (large-sized)
    2 kg of Sugar Powder (sugar ground to a powdered form at home)

    Method to Prepare the Amla Syrup

    1. First wash the amlas and wipe them dry.


    2. Then cut the amlas and deseed them. Keep them aside in a large bowl.


    3.  Grind or grate the amlas in two batch and keep aside. I prefer grating the amlas.


    4.  Add the sugar powder into the ground or grated amlas and mix well with a spoon.

    5. Keep this mixture aside, covered with a lid for a week, keep mixing with a spoon in every 2-3 days regularly as the sugar starts melting slowly.

    6. After a week the sugar melts completely and the mixture becomes concentrated (as shown below). Now strain this mixture and separate the concentrated amla syrup from the leftover amla pulp.


    7. Store the amla syrup in a glass bottle and refrigerate. (This can be stored for a longer duration. When refrigerated the color of the syrup might change).


    8. Now sun dry the amla pulp by spreading on a clean cloth. After few days of drying out in the sun the leftover amla pulp will dry and turn crispy.


    9. Store and keep the dried amla flakes in an air tight glass container and have it as a mouth freshner.

    Serve your guests and loved ones with this healthy sharbat or lemonade syrup by mixing 2 to 3 tsp of the concentrated syrup with a glass water and adding 1/2 a tsp of fresh ginger juice. You don't need to add extra sugar to your sharbat.

    Surprise your friends with your own step by step preparation for amla (Indian gooseberry) sharbat (lemonade) and mukhwas (mouth freshner) and compel them to ask you for the recipes.

    Monday, 16 March 2015

    Recipe for Chaat Masala Powder


    Preparation/Total Time: 5 minutes
    Ingredients:
    3 tbsp of Cumin seeds (Jeera)
    1 tbsp of Coriander seeds (Dhania)
    1 ½ tsp of Fennel seeds (Saunf)
    4 tbsp of raw Mango Powder (Amchoor Powder in India)
    3 tbsp of Black Salt Powder
    1 ½ tsp of fresh Ground Pepper Powder
    1/4th tsp of Asafoetida Powder
    1 ½ tsp of dry Ginger Powder
    1 tsp of Mint Powder (dried Pudina leaves ground to a powder form)
    1 ½ tsp of Carom seeds (Ajwain in India)

    Method
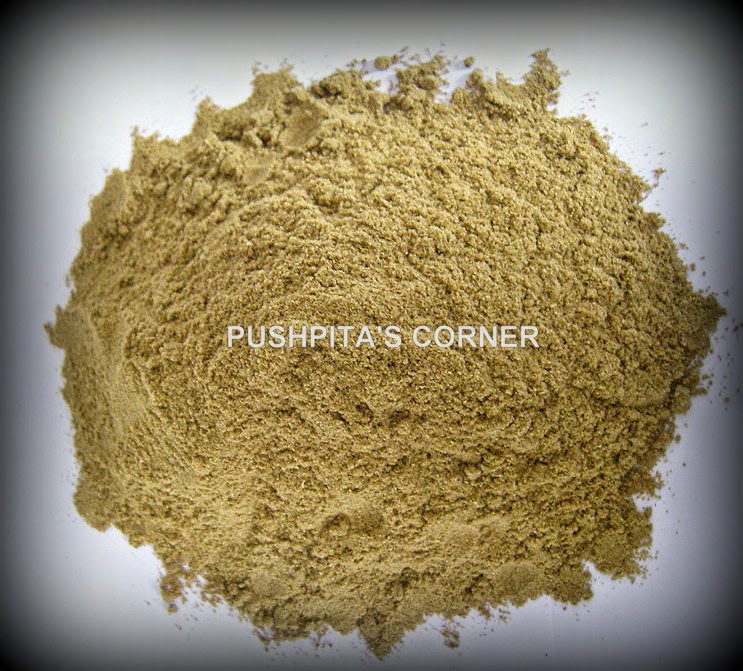
    On a hot flat griddle set on medium flame dry roast all the above mentioned ingredients till they give out their aroma, while stirring continuously to avoid burning the whole spices. Let them cool on a plate.  Then put the roasted spices into a food blender and ground them to a smooth and fine powder form.

    Note: This is an easy method, making it few times will definitely make an expert out of you soon then. Do not store this powder for more than 2 to 3 months as they tend to lose the aroma and flavor. Store in an airtight glass container, in a cool and dry place (best in your fridge). Why not get loads of appreciation out of your efforts for a custom made blend from loved ones and friends.

    Tips:
    You can add your chaat masala to any salad preparation (right from mixed fruit salad to your favorite green vegetable salad too)
    Fond of fresh lemon juice? Add a zing to your fresh lemon juice or lemonade with a pinch of your homemade chaat masala and enjoy a different taste of your regular lemonade and juice.


    Recipes for Homemade Idli Batter and Idli With Coconut Chutney (Dip)


    Idli with coconut chutney and sambhar is something everyone enjoys. My family too look forward to having idlis for breakfast very often, especially my 8 year old son, who enjoy it with tomato sauce (his most favored lunchbox item throughout the week at school). So I always make the batter at home as, I don't prefer the ready-made bater which is tangier than the homemade one (sharing the ingredients and process to prepare the batter too below along with the idli and coconut chutney recipes).
    So lets get started with the batter recipe first since without it we cannot proceed with the main recipe for idli and chutney (dip).

    Idli Batter and Idli Recipes

    Soaking Time: 4-5 hours
    Preparation time: 20-25 mins
    Fermentation Time: 8-9 hours during Summer and almost for 18 hours during Winter (keep in a warm place)
    Cooking Time: 25 mins.
    Serving : 30-32 idlis

    Ingredients for the Batter:
    3 small cups of Split Urad dal or Black Gram skinned (Urad Dhuli in Hindi)
    1 1/2 small cups of Par Boiled rice (you can make use of any other rice too including brown rice)
    Salt to Taste

    Preparation
    1. Wash and soak the dal and the rice in two separate large bowls. Keep them aside for atleast 4 to 5 hours.
    2. Now drain the water from both the rice and dal and keep the dal soaked water aside for later use.
    3. Wet the inner surface of the grinder and put rice into it to grind in 2-3 small batches to a paste (not thick nor thin) (add 1-2 tbsp of the reserved urad dal water in between) not finely ground leave it slightly coarse as it will make your idli softer when you prepare it. (earlier I use to finely grind the rice into a smooth paste but 2 weeks ago I tried experimenting by leaving the rice paste slightly coarse, the idlis were softer than previously prepared ones).
    4. Now turn to make the urad dal paste or batter. Wet the inner surface of the grinder and put the urad dal into it for grinding in 2 batches to a smooth paste (not thick nor thin) (add 2 or 3 tbsp of the reserved dal water in between the grinding process).
    5. Now mix both ground paste properly and cover with a lid (No air-tight lids). Keep the paste aside overnight for fermentation (preferably for 9 hours). (the wild yeast in the urad dal as well as some anaerobic bacteria helps in the fermentation process along with the ideal temperature for the process which is between 30 degrees to 32 degrees. So the warmer the temperature the better for the fermentation process and your batter too).
    6.  Next morning to your surprise you will find the batter double the original level or might even  reach the lid as it happens with me every time I prepare this bater.
    7. Now in a pressure cooker pour some water and let the water boil.
    8. In the mean time, grease the idli mould with oil. I use butter for my son, almost like butter idli for him).
    9. Now take the batter and add some salt to taste to the batter and swirl the bater gently for few minutes.
    10. Take a spoon and pour the batter into the the moulds.
    11. Put the idli mould inside the cooker for 10 to 12 mins and steam removing the vent of the cooker lid.
    12. In between check with a toothpick to see if the idli is done. If the toothpick doesn't come clean then keep it for few more mins. until it is done.( do not overcook else the idlis will become dry)
    Turn to prepare our Chutney or Dip

    Ingredients for the Coconut Chutney:
    1 cup or 250 ml of fresh grated coconut
    1 green chilly (optional)
    1 or 2 Garlic Flakes
    1/2" fresh Ginger
    1 tbsp roasted Chana Dal (Split skinned Bengal gram)
    1-2 tbsp Water
    Salt to Taste

    For Tempering:
    1/2 tsp Black Mustard/Rai Seeds
    3/4th tsp Urad Dal
    1 sprig of Curry leaves
    A pinch of Hing or Asafoetida
    1 tbsp of Vegetable oil

    Preparation:
    1. Grind all the main ingredients for the Chutney (not the one meant for tempering) to a smooth paste. (Add water in between for a smooth paste).
    2. Now heat oil in a pan and add the mustard seeds and urad dal.
    3. Let the mustard seed splatter and the urad dal turn light brown in color.
    4. Add the curry leaves and hing to it and fry for few seconds. (My curry leaves went out of stock today so didn't add any)
    5. Pour the coriander-coconut paste and stir.
    6. Serve this chutney with the idli. (See the post image, we have had it today morn for breakfast).
    I am sure after going through this post your self-made idli batter and the healthy, tasty and filling breakfast out of it accompanied by the chutney or dip will leave the tummies happy and satisfied till lunch time.
    Do get back and share your idli making and eating experience you have had with your loved ones. Share this easy recipe with your friends too. Until then happy serving and eating too!


    Sunday, 15 March 2015

    Mughlai Dish-Mutton Biryani Recipe


    Preparation/Cooking Time:2 hours 30 mins

    Serving: 4

    Ingredients for the Gravy:

    1 kg pre-boiled Mutton with bones (pressure cooked and boiled till tender and soft, 7 whistles)
    4-5 Medium-sized Potatoes, peeled, washed and cut into large cubes
    400 gms Curd or Dahi
    6 Large Onions, peeled, washed and cut into thin slices
    3 Medium-sized Onions sliced and caramelized
    6-7 Garlic Flakes, peeled,washed and grounded to a paste using a pestle and mortar or else a grinder.
    1 tsp Shahjeera or Jeera (Cumin seeds) whole
    3 pieces of Mace (Javitri or Jaipatri)
    4-5 Cloves or Lavang (whole)
    1/2 tsp of whole Peppercorn (Black Pepper or Kali Mirch)
    2"Dalchini (Cinnamon) piece
    2-3 Bay Leaves (Tejpatta)
    4-5 Green Cardamom (Chhoti Elaichi)
    4 Black Cardamom or Badi Elaichi (whole)
    1 1/2 tsp Turmeric or Haldi Powder
    1/2 tsp Red Chilly Powder (you can add more if you are spicy food lover)
    1 tbsp Garam Masala Powder
    2 cups of Vegetable oil (1 1/2 cup for the gravy)
    Few strands of Kesar or Saffron
    1/2 cup warm milk
    Salt to Taste
    A handful of chopped mint or pudina leaves for garnishing

    Ingredients for the Rice:


    1/2 kg Basmati or Aroma Rice, cleaned, washed, soaked in water and kept aside 1/2 an hour ago
    (Note: The quantity of Rice should always be half the quantity of the Mutton)
    7-8 cups of Water
    4 Star Anise or Chakra phool(whole)
    3-4 Green Cardamom(whole)
    2" piece of Cinnamon or Dalchini

    Method to Prepare the Rice:

    In a pan bring 7 to 8 cups of water to a boil. When the water starts boiling put the spices into it.Add in the rice and cook approx. for 5 mins. Run it through a sieve and spread it on a plate and keep aside.

    Method to Prepare the Caramelized Onions:

    In a hot fry pan put 1/2 cup of vegetable oil and the medium-sized onion slices. Fry till the onions are caramelized (bit darker than golden brown only). Remove it in a bowl and keep it aside.

    Preparation for the Gravy:


    1. Heat the remaining 1 1/2 cups of the oil in a non-stick deep frying pan or kadhai.
    2. Put the jeera, whole spices (bay leaves, peppercorn, cloves, mace, cinnamon, green and black cardamom) and stir fry them using a flat wooden spatula for 2 mins on a medium flame.
    3. Put the onions slices (6 large onions slices) immediately into the frying pan and stir fry them till golden brown. Keep stirring frequently to avoid burning the onions.
    4. Add the garlic paste and salt and stir fry for 3 mins.
    5. Now add turmeric, powder, red chilly powder and garam masala powder and stir fry the onions for 3-4 mins.
    6. Add the curd and fry the spices for another 10 mins.
    7. Now add the mutton pieces one by one into the gravy and stir well.
    8. Cover with a lid and let it simmer for another 10 mins on low flame.
    9. Add the fried caramelized onions into the gravy and stir it and let it cook for another 5 mins. 
    10. Separately add the saffron strands into the warm milk and keep aside.
    11. Now add the rice and spread it evenly all over the gravy with the wooden spatula. Or,you can arrange the rice and mutton layer-wise. In a separate deep-bottomed pot or pan place and spread half of the rice evenly, then top it with the gravy and spread the remaining half over the gravy.
    12. Pour the milk all over the rice.
    13. Cook on a low flame for another 10 mins approx.(this time put a flat girdle or tawa beneath the pan to avoid burning the rice or gravy).
    14. Garnish with the chopped mint leaves.
    Note: I don't make use of ghee as it will be heavier for the stomach. Also you can garnish your Mutton Biryani with fried cashew-nuts and raisins (kismis) along with the mint leaves before serving. You can prepare Chicken and Vegetable Biryani in the same process.
    Mutton Biryani ready to be served hot with green salads or raita.

    Enjoy the meal and get back with your experience of this wonderful easy recipe.
    Till then Bon Appetit!